Views: 0 Author: Site Editor Publish Time: 2026-07-24 Origin: Site


Upgrading your outdoor living space often represents a significant property investment. A premium deck promises years of low-maintenance beauty, but only if you build it correctly from the ground up. Sadly, poor installation can completely compromise this investment.
Treating modern synthetic materials exactly like traditional timber leads to severe structural degradation. Mistakes cause aesthetic ruin and quickly void manufacturer warranties. Many homeowners and contractors learn too late how devastating these simple errors can be. A successful project requires a fundamentally different approach to construction.
To prevent these failures, you must understand how to manage thermal expansion, under-deck airflow, and proprietary fastening systems. This guide provides an evidence-backed roadmap to bypass common installation pitfalls. Follow these strategies to ensure deck longevity and safely protect your material warranty.
Subframe Architecture: Composite materials require tighter joist spacing than traditional wood to prevent structural sagging.
Thermal Movement: WPC decking expands and contracts with temperature changes; precise gap calculations are non-negotiable.
Airflow & Drainage: Adequate ground clearance and cross-ventilation prevent moisture accumulation and board cupping.
Hardware Compliance: Using non-approved, traditional wood screws causes surface mushrooming and hardware failure.
Warranty Alignment: Strict adherence to manufacturer-specific installation guidelines is the only way to protect your investment.
Traditional wood framing habits often doom a modern deck before you lay the first board. Applying standard timber joist spacing to modern deck boards is a massive mistake. Installers frequently use 16-inch, 24-inch, or wider spans based on older carpentry habits. They also frequently fail to adjust spacing when planning diagonal board layouts.
Unlike rigid timber, synthetic boards contain plastic polymers. They possess distinct flexural properties under continuous load and high temperatures. Over time, poorly supported deck boards will sag between the joists. They warp permanently and create an uneven, highly unsafe walking surface. Heat exacerbates this sagging effect during peak summer months.
To solve this, adhere strictly to the manufacturer’s maximum span charts. Treat these charts as structural mandates rather than mere suggestions. Standard residential Composite Decking typically requires a maximum of 16 inches on-center for standard perpendicular installations. When you install boards at a 45-degree angle, you must reduce this spacing to 12 inches on-center.
Additionally, implement double joisting where board ends meet. These areas are called butt joints. A single joist provides insufficient anchoring space for two abutting board ends. Double joisting ensures independent fastener anchoring for each board. This practice prevents the board ends from splitting or breaking away from hidden clips.
Consider the following span guidelines for residential applications:
Decking Layout Angle | Maximum Joist Spacing (On-Center) | Subframe Requirement |
|---|---|---|
Perpendicular (90 degrees) | 16 inches | Single joist standard; double at butt joints |
Diagonal (45 degrees) | 12 inches | Single joist standard; double at butt joints |
Commercial Heavy Load | 12 inches | Check specific engineering requirements |
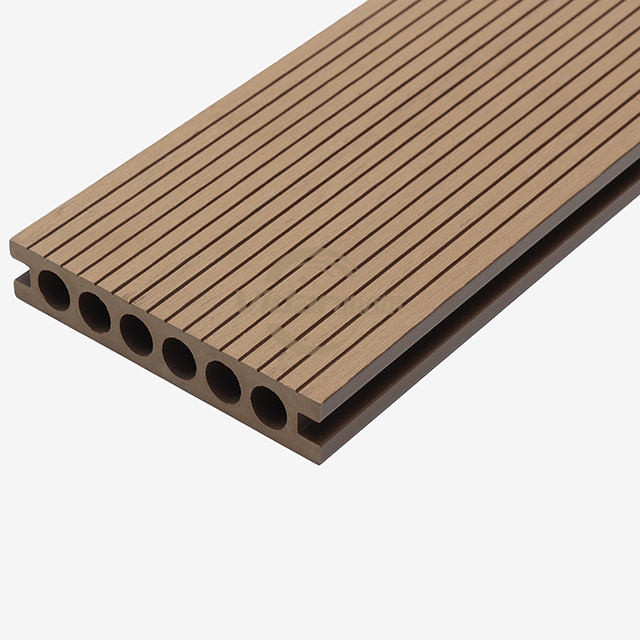
Thermal movement represents the most critical difference between wood and synthetic decking. Installing boards tightly end-to-end is a catastrophic error. Placing them flush against fixed structures like walls or posts guarantees future damage. Installers often forget to account for the ambient temperature during the installation day.
As temperatures rise, synthetic boards expand significantly along their length. Without dedicated expansion gaps, expanding boards will aggressively buckle upward. They warp out of shape and often shear their metal fasteners entirely. In severe cases, expanding boards generate enough lateral force to crack adjacent masonry or push over railing posts.
You must carefully calculate all expansion gaps. Follow the specific gaping chart provided by your material brand. This chart varies based on board length and the exact temperature on the day you install the deck. If you install on a freezing winter day, you must leave larger gaps. The boards will expand significantly in summer.
Follow these specific spacing protocols during assembly:
Check Ambient Temperature: Use a thermometer to record the job site temperature before cutting any boards.
Determine End-to-End Spacing: Leave the required gaps at all butt joints. Never force two boards tightly together.
Manage Perimeter Gaps: Leave a minimum gap where the deck meets house walls, structural posts, or permanent planters.
Maintain Side-to-Side Spacing: Utilize approved hidden fasteners. These clips naturally space boards uniformly (typically 3/16 to 1/4 inch). This lateral gap allows for minor width expansion and facilitates water drainage.
Building a deck too close to the ground creates severe micro-climate issues. Blocking fascia board airflow chokes the undercarriage. Failing to install proper drainage grading beneath the substructure traps standing water. These common planning errors suffocate the entire deck system.
Trapped moisture and uneven thermal loads destroy structural integrity. The bottom of the synthetic boards absorbs persistent ambient moisture and swells. Meanwhile, direct sunlight rapidly dries the top surface. This extreme moisture gradient causes severe board cupping. It also promotes toxic mold growth and accelerates the premature decay of your timber subframe.
You must actively engineer airflow into your deck design. Maintain a minimum ground clearance. This clearance is usually 6 inches or more, depending heavily on specific manufacturer instructions. The deck needs room to breathe underneath.
Ensure unobstructed cross-ventilation on at least three sides of the deck perimeter. Do not seal the deck base entirely with solid fascia boards. Leave ventilation gaps or install discreet louvers. Furthermore, install a high-quality permeable weed barrier over the soil. Add a gravel base over properly sloped ground. This grading directs standing water safely away from the wooden subframe.
Fastening hardware acts as the anchor of your entire outdoor project. Using standard wood screws ruins synthetic boards instantly. Generic hidden clips and pneumatic nailers fail to grip modern materials correctly. You must avoid abandoning the proprietary fastening ecosystem designed specifically for your chosen materials.
Traditional wood screws displace the dense synthetic core material upward. This action causes ugly, raised "mushrooming" around every screw head. It ruins the deck's barefoot-friendly surface. Incompatible generic metal clips can rapidly corrode in outdoor environments. They often squeak loudly underfoot or fail to secure the boards against powerful uplift wind forces.
Exclusively use fasteners designed for these modern materials. Engineered composite screws feature specialized reverse threading. This design pulls displaced material back down beneath the surface, leaving a clean finish. Alternatively, use the brand’s officially approved hidden fastener system for a flawless, screw-free aesthetic.
Ensure all hardware matches your specific environmental conditions. If you build near a coastline, you must use 316-grade stainless steel clips and screws. Standard coated screws will rust and fail in salty air. For standard inland use, high-quality powder-coated or epoxy-coated hardware suffices. When securing premium Composite Decking,WPC decking, using matched hardware prevents unnecessary warranty disputes.
Mistakes often happen weeks before the actual assembly begins. Storing uninstalled boards on uneven ground damages them rapidly. Laying them directly on wet dirt invites staining and moisture issues. Exposing stacked boards to extreme, uneven sunlight for prolonged periods causes uneven heat absorption.
When stacked improperly, these boards can develop permanent bowing. They acquire a "thermal memory" while sitting in the hot sun over uneven terrain. Once a board bends and cools in that shape, it becomes nearly impossible to install. You will struggle endlessly to force warped boards straight and flush on the joists.
Protect your materials by practicing strict site management. Follow these essential storage rules:
Store all boards completely flat on a rigid, level surface.
Keep them fully supported by timber bearers spaced no more than 16 inches apart.
Never dump the delivery load directly onto an uneven lawn or slanted driveway.
Keep materials covered with a lightly colored, breathable tarp.
Alternatively, store them in a shaded, well-ventilated area like a garage.
Allow the boards to acclimate to the local job site temperature for 48 hours prior to cutting.
Buyers often evaluate decking materials solely on surface aesthetics and color options. They ignore the hidden ecosystem of installation support and hardware. This oversight frequently determines the final project's success or failure. A beautiful board means nothing if you lack the right tools to install it safely.
You must evaluate potential vendors across several critical dimensions. First, look for a comprehensive ecosystem. Does the vendor supply a fully integrated system? You need matching boards, compatible fascia, optimized hidden fasteners, and dedicated finishing trims. Mixing and matching different brands often causes unexpected hardware conflicts.
Second, demand clarity of compliance. Are the installation guidelines transparent? They must be technically specific and easily accessible prior to purchase. If a company hides its installation manual, you should consider it a major red flag.
Third, look for warranty pragmatism. Seek out warranties that explicitly protect against staining, fading, and structural failure. However, remember these warranties remain valid only provided you follow the specified installation framework to the letter.
Prioritize manufacturers who offer engineered subframe solutions alongside their deck boards. Look for comprehensive, easy-to-read installation documentation. Accessible technical support serves as a lifeline for both professional contractors and advanced DIYers. When you run into a strange framing obstacle, you need a vendor who answers the phone.
Avoiding critical deck installation mistakes requires shifting your entire approach. You must move away from a traditional "carpentry" mindset. Embrace a "system assembly" mindset instead. Every component must interact perfectly with the others.
Proper joist spacing prevents structural sagging and ensures safety. Precise thermal gap management keeps boards from buckling under the summer sun. Adequate ground ventilation stops moisture from destroying your timber subframe. Finally, strict hardware selection dictates the lifespan and surface beauty of the deck.
Before you begin, review your shortlisted materials' installation manuals thoroughly. Read them cover to cover before purchasing a single board. Consult with a certified installer or technical representative early in your planning phase. Verify that your specific subframe design, joist layout, and drainage plan meet all manufacturer requirements.
A: No. Installing over existing decking traps moisture, limits airflow, and invalidates warranties. It creates an environment for mold and severe rotting. Always remove old boards and install directly onto a properly spaced, engineered joist subframe.
A: Generally, you need 16 inches on-center for standard perpendicular layouts. You need 12 inches on-center for diagonal layouts. However, strict adherence to your specific manufacturer's engineering specifications is always required.
A: Composite boards expand and contract along their length. Double joists provide dedicated, wide anchoring for each individual board end. This extra framing allows proper use of hidden fasteners without splitting the board edge.
A: Yes. Composite screws feature specialized reverse threading to prevent surface mushrooming. They pull the dense material down smoothly. Alternatively, using the manufacturer-approved hidden clip systems is highly recommended for a clean finish.