Views: 0 Author: Site Editor Publish Time: 2026-07-29 Origin: Site


Upgrading to a composite deck is a high-value, decades-long investment. Relying solely on digital renders or showroom lighting introduces unnecessary risk to your upcoming project. Screen calibrations inherently distort product colors. Furthermore, controlled showroom environments actively hide how materials perform under direct UV exposure or adverse weather conditions. You simply cannot accurately gauge barefoot comfort from a computer monitor.
Ordering physical samples represents the critical final step in your evaluation process. This comprehensive guide provides an evidence-based framework for stress-testing composite boards directly at home. We will help you ensure strict alignment regarding climate suitability, functional durability, and structural needs. You will learn exactly how to analyze material cross-sections, conduct extreme durability tests, and transition seamlessly from sample evaluation to a finalized materials order.
Tactile Verification: Physical samples are essential for validating the texture, slip resistance, and true color under your property’s specific natural lighting.
Profile Implications: The cross-section of your sample (solid vs. scalloped) dictates weight, cost, and specific structural requirements like joist spacing.
Performance Testing: Subjecting samples to controlled at-home stress tests (heat, scratch, stain) provides verifiable proof of manufacturer claims.
Implementation Readiness: Evaluating samples helps identify potential installation complexities, including thermal expansion tolerances and hidden fastener compatibility.
Natural sunlight constantly shifts throughout the day. These shifts dramatically alter how we perceive exterior colors. A board might look perfectly slate gray in a warehouse. However, it could show unwanted blue undertones under your backyard sun. Local sun orientation plays a massive role in this visual phenomenon. North-facing yards receive cooler, indirect sunlight. South-facing yards endure intense, warm afternoon rays. Surrounding foliage also casts green reflections onto flat surfaces.
You must observe your samples outside. Move them around your property during morning, noon, and evening hours. This guarantees you actually like the color in your specific environment.
Next, you must validate the surface texture. High-resolution digital photos completely fail to convey realistic embossed wood grain patterns. You cannot feel depth through a smartphone screen. You need to touch the board. Barefoot slip resistance remains a crucial tactile metric. Wet composite surfaces vary wildly in traction. Families must ensure sufficient grip around pool areas or rainy zones.
Ordering physical Composite Decking samples serves as a cheap insurance policy. Manufacturers sometimes offer these pieces entirely for free. Even if you pay a small shipping fee, you protect yourself. Returning pallets of bulk building materials costs a massive amount of money. You completely mitigate buyer's remorse by handling the product before ordering.
Pick up your sample piece right now. Examine the raw, cut end closely. This cross-section reveals the underlying engineering of the board. You will spot distinct manufacturing choices immediately.
Look at the outer edge of the cross-section. You should see a protective polymer shell wrapping around the inner core. We call this outer layer the "cap". Early generation boards were completely uncapped. They absorbed organic stains and faded quickly under UV light.
Modern boards utilize advanced capping technology. The thickness and coverage area dictate long-term durability. Some boards feature a three-sided cap. This protects the top surface and the side grooves. The bottom remains exposed to allow moisture escape. Other premium options feature a four-sided cap. This fully encapsulates the entire board. Fully capped options deliver superior moisture resistance. They handle extreme weather exceptionally well. You will find they resist mold much better over the decades.
Manufacturers shape the inner core differently to meet specific project needs. Your sample will either be fully solid or grooved underneath.
Solid Boards: Solid profiles closely resemble traditional lumber. They feel heavy and dense in your hands. We highly recommend solid profiles for high-traffic commercial areas. They perform excellently on residential stairs. Installers prefer them when creating complex edge detailing. Solid boards offer maximum structural rigidity.
Scalloped (Grooved Bottom) Boards: Turn the sample over. You might see arched grooves carved into the bottom. This scalloped design removes excess material safely. It creates a lighter, highly efficient board. You save money because manufacturing requires fewer raw materials. However, you must verify joist-spacing compliance. Scalloped boards often require strict 16-inch center maximum spacing. Their flex profile differs significantly from solid alternatives. A wider joist span might cause unwanted bouncing underfoot.
Profile Type | Capping Coverage | Best Use Case | Structural Rigidity |
|---|---|---|---|
Solid Board | 4-Sided | High traffic, stairs, wet zones | Maximum |
Solid Board | 3-Sided | Standard residential decks | High |
Scalloped Board | 4-Sided | Budget-friendly, damp climates | Moderate |
Scalloped Board | 3-Sided | Basic patios, dry climates | Moderate |
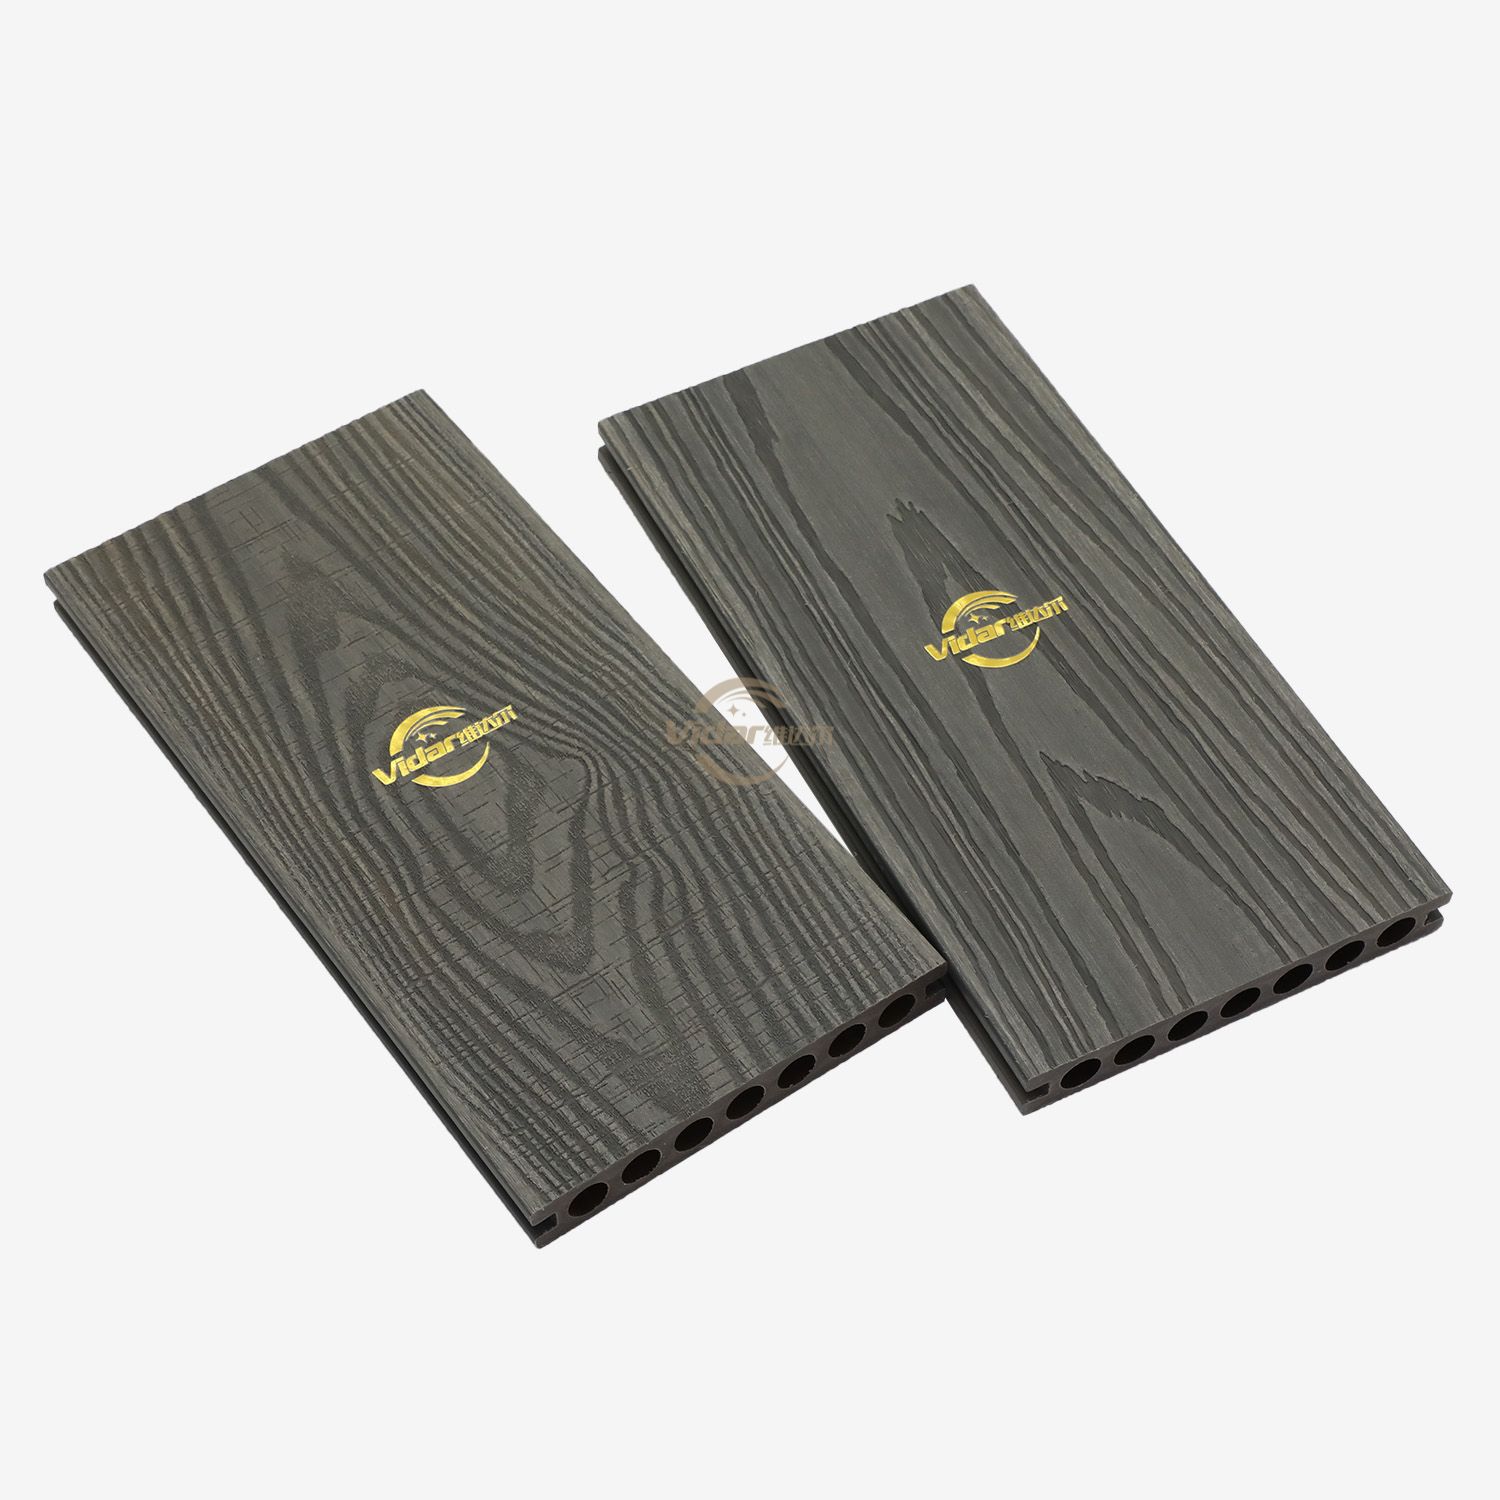
Never take marketing brochures at face value. You must actively try to damage your samples. Subjecting these blocks to extreme conditions establishes a clear baseline for everyday durability. Grab your WPC decking samples and begin testing.
Darker materials naturally absorb thermal energy. Lighter colors reflect it. You need to know exactly how hot your deck will get in July.
Action: Place the sample flat on your driveway. Leave it in direct afternoon sunlight for two solid hours.
Evaluation: Walk onto the sample barefoot. Carefully test the heat retention using your hands and feet. Lighter colors naturally retain less heat. However, advanced composites mitigate thermal transfer much better than early-generation materials. You want a surface you can comfortably walk across during summer barbecues.
Do not test the heat retention indoors near a window. Window glass filters out specific UV wavelengths. Always conduct this test completely outdoors.
Decks endure constant physical abuse. Patio furniture slides around. Large dogs run across the planks. You must evaluate the polymer cap strength.
Action: Drag a heavy metal chair leg across the surface. Vigorously rub a hard plastic dog toy against the grain. Press down firmly to mimic real-world friction.
Evaluation: Assess the visible damage on the polymer cap. You must distinguish between superficial scuffs and deep structural scratches. Superficial marks often weather away naturally over time. Deep gouges indicate a softer, less resilient cap material.
Outdoor dining guarantees eventual accidents. Grease and wine ruin traditional wood. Modern composites claim total stain resistance. You should verify this independently.
Action: Smear common household hazards onto the board. Use chemical sunscreen, red wine, and hot cooking grease. Let these substances sit untouched for 24 hours.
Evaluation: Attempt to clean the board using only standard dish soap and warm water. A premium cap will release the stains effortlessly. This simple process verifies the non-porous claims of the manufacturer. If a shadow remains, the capping technology is inferior.
Moisture destroys traditional lumber. Water ingress causes swelling, warping, and eventual rot. You must ensure the composite core remains completely waterproof.
Action: Fill a bucket halfway. Submerge the raw, cut end of the sample into the water. Leave it soaking continuously for 48 hours.
Evaluation: Remove the block and inspect the exposed core layer. Check carefully for any visible swelling. Look for crumbling edges. A high-quality composite core will exhibit near-zero moisture absorption. The dimensions should remain perfectly identical to the dry samples.
A single sample represents only the main field board. Your actual deck requires multiple components. You must evaluate broader implementation realities before ordering.
Think about your fascia and edge detailing. Real-world decks have visible perimeters and staircases. You must evaluate component availability. Ensure the manufacturer offers perfectly color-matched fascia boards. Stair treads require specific bullnose profiles. End-caps must blend seamlessly into the main layout. An ugly, unmatched edge ruins the entire aesthetic.
Next, consider your fastening systems. Look closely at the side edges of your sample piece. Grooved edges strongly indicate compatibility regarding hidden clip systems. Hidden fasteners create a smooth, modern surface. No screws remain visible from above. Solid edges typically require traditional face-screwing. Discuss these visual impacts early in your planning phase.
Finally, you must confront thermal expansion assumptions. Your small six-inch block remains completely static. Conversely, a full sixteen-foot plank will inevitably expand and contract. Plastics grow slightly when heated. You must review the specific manufacturer gapping guidelines. Proper spacing prevents buckling during hot summer months. Failure to leave expansion gaps causes catastrophic structural warping.
Ordering samples requires strategic forethought. You must curate your initial box intelligently.
We advise selecting three to five contrasting samples. Do not order five nearly identical shades of gray. Contrasting tones effectively gauge how different colors interact alongside your home exterior. Place a dark walnut sample next to a light oak one. Lean them against your exterior cladding. Dark siding often pairs beautifully against lighter decking. Light brick sometimes demands a deeper, richer deck color for visual grounding.
You must balance upfront cost against long-term outcomes. Premium lines offer superior scratch resistance and realistic textures. They handle heavy pet traffic flawlessly. However, they cost significantly more. Entry-level scalloped boards provide budget-friendly practicality. They serve standard, low-traffic patio spaces perfectly. Decide which performance metrics matter most to your family.
Now you can finalize your project parameters. Guide your next steps logically. Measure your exact square footage twice. Consult a professional contractor regarding your underlying joist health. Older joists might require reinforcement before taking on heavier composite loads. Transition smoothly from your sample approval phase to requesting a final material quote.
A physical sample genuinely bridges the gap between manufacturer marketing and real-world performance. Holding the actual material removes guesswork from your outdoor renovation. You gain immense confidence by verifying colors, textures, and structural profiles firsthand.
Order a diverse sample box featuring varying shades and profiles.
Conduct the four crucial durability stress tests vigorously over a weekend.
Inspect your current deck substructure to confirm joist spacing compliance.
Finalize your ultimate color selection strictly under natural outdoor sunlight.
Visit our sample ordering portal right now. We encourage you to order a curated box today to begin your localized testing process.
A: Most manufacturers provide samples ranging from 6 to 12 inches long. This size provides enough surface area to gauge the wood grain texture. It also allows you to clearly inspect the cross-section engineering and capping thickness.
A: Yes, but expect minor acceptable variances. Manufacturing involves blending recycled plastics and wood fibers. This inherently causes slight batch-to-batch tonal differences. However, the sample accurately represents the core color family without significant mismatches.
A: Many premium brands offer specific rebate programs. They often credit your initial sample fee toward your final bulk purchase. Other brands simply provide free samples upfront, charging only a minimal shipping fee.
A: We strongly recommend ordering 3 to 5 distinct samples. This quantity allows you to compare tonal variations and profile types efficiently. Ordering more than five often causes unnecessary decision paralysis and slows down your project timeline.