Views: 0 Author: Site Editor Publish Time: 2026-07-17 Origin: Site


Homeowners are rapidly abandoning traditional timber for modern outdoor projects. They prefer engineered materials because they drastically reduce lifecycle maintenance needs. You no longer have to spend your weekends sanding, staining, or sealing boards. This shift allows you to enjoy your backyard rather than constantly working on it.
However, browsing beautiful photos online is only the first step. To execute a flawless DIY upgrade, you must look beyond surface-level inspiration. You need to grasp practical evaluation logic. We must also address strict structural realities and manage procurement effectively to guarantee a lasting installation.
We will explore five actionable DIY design concepts below. This guide emphasizes how proper material selection drives project longevity. You will learn about structural limitations, thermal expansion rules, and smart waste mitigation strategies. These insights will ensure your outdoor space remains beautiful and structurally sound for decades.
Structural prerequisites: WPC decking has different flex tolerances than wood, requiring strict adherence to specific joist spacing (typically 12" to 16" on-center).
High-ROI execution: Resurfacing an existing substructure offers the highest cost-to-value ratio, provided the foundational framing is verified for structural integrity.
Waste mitigation: Strategic DIY designs incorporate off-cuts and leftover materials into functional add-ons (planters, seating), optimizing the total material yield.
Profile selection matters: The choice between solid and scalloped boards directly impacts upfront costs, edge visibility, and complex installation methods like picture-framing.
Many homeowners want to expand their usable outdoor square footage. They often hesitate due to the high costs associated with elevated structures. Deep footings demand heavy labor. Complex permits delay timelines and increase frustration. A modular floating deck solves this business problem effectively.
You can construct a low-elevation, standalone deck right in your backyard. This solution approach uses a specialized sleeper system. Alternatively, you can use pre-cast concrete deck blocks. These blocks support the frame securely without digging deep holes. You bypass the permit maze while creating a stunning outdoor living area.
Implementation requires strict attention to specific risks. Ground-hugging designs naturally restrict airflow. They risk trapping moisture beneath the boards. You must address this to protect your investment.
Ventilation: Elevate the frame sufficiently to allow cross-breeze. Airflow keeps the underside dry and prevents premature degradation.
Compliance: Always verify the manufacturer minimum ground-clearance requirements. Installing boards too low can trap heat and humidity. Ignoring these guidelines will typically void your product warranty.
Substructure: Standard untreated wood will rot quickly near the soil. You require pressure-treated timber rated specifically for ground contact. Some DIYers prefer aluminum framing for ultimate moisture resistance.
Following these steps ensures your ground-level deck remains stable. Composite Decking performs beautifully in these setups when properly ventilated.
You might already have an old wooden deck. Upgrading its aesthetics eliminates exhausting annual staining requirements. You can achieve this without the massive capital expenditure of a full tear-down. Substructure resurfacing stands as the ultimate high-ROI upgrade.
The solution approach begins with demolition. You remove the old wooden surface boards carefully. You then assess the current framing beneath them. If the frame remains solid, you simply apply new engineered materials over it. This saves thousands of dollars in lumber and labor.
However, you must evaluate the existing foundation rigorously. Missing a structural flaw now will ruin your new surface later.
Joist Integrity: Probe the existing joists with a screwdriver. Look for soft spots or dry rot. If the wood is solid, apply high-quality joist tape over the tops. This waterproof barrier extends the frame lifespan significantly.
Span Limitations: Older wood decks often utilize 24-inch joist spacing. Standard timber bridges this gap easily. However, engineered boards have different flex tolerances. They will sag over a 24-inch span.
DIYers must add intermediate joists. You must achieve the required 16-inch or 12-inch spans before installing the new surface.
Application Type | Traditional Wood Spacing | Engineered Board Requirement |
|---|---|---|
Standard Perpendicular Run | 16 to 24 inches on-center | 12 to 16 inches on-center |
Diagonal Installation (45 degrees) | 16 inches on-center | 12 inches on-center |
Stair Stringers | 16 inches on-center | 9 to 12 inches on-center |
Maximizing the utility of your initial material order reduces secondary purchases. You do not need to buy expensive patio furniture. You can build these features directly into the deck architecture. This solves a major budget problem while creating a cohesive, custom look.
The solution involves designing multi-tiered levels. These short steps act as natural, casual seating for large gatherings. You can also construct perimeter planter boxes. Use matching fascia boards or standard planks to build these elegant additions. They define the deck boundary safely without obstructing the view.
Implementation brings specific structural and environmental challenges. You must manage them carefully.
Structural Load: Built-in benches carry significant dynamic weight. They require robust, reinforced framing. You must build this skeleton using pressure-treated lumber. The aesthetic cladding simply covers this strong separate frame.
Moisture Management: Planters introduce constant moisture to the area. They must include heavy-duty waterproof liners. EPDM rubber works well here. You also need proper drainage holes routing water away from the deck surface. Direct, prolonged soil and water contact will degrade the board core over time.
Integrated features elevate the entire backyard experience. Using WPC decking ensures these built-ins match your main floor perfectly.
Homeowners often want a premium, architecturally designed appearance. A standard linear floor can sometimes look plain. You can elevate property value by introducing distinct borders. You can also create zoned areas for specific activities. Separating a dining zone from a grilling zone adds immense visual interest.
The solution approach relies on a technique called picture framing. You install contrasting-colored perimeter boards horizontally to the main grain. A dark charcoal border around a light grey interior looks spectacular. This method hides the cut ends of the main floorboards. It delivers a polished, professional finish.
Execution realities demand advanced DIY skills. You cannot rush this process.
Material Limitations: Picture framing exposes the outer edge of the perimeter board. This requires solid-profile boards. Scalloped boards have ridged bottoms. They will reveal ugly hollow channels if used on an exposed edge.
Thermal Expansion: Boards expand and contract as temperatures change. Picture framing places boards perpendicular to each other. They will expand at different rates along those meeting points. This demands precise miter cuts. You must also use specialized hidden fasteners to accommodate this varying movement safely.
Standard material orders typically require a 10 to 15 percent overage. You need this buffer for cutting mistakes and complex angles. However, these boards are expensive. Throwing them away hurts your project budget. Success is defined by utilizing these leftovers to achieve a 100 percent material yield.
The solution approach involves repurposing board ends creatively. You can cut them into uniform squares. They make excellent stepping stones for a garden pathway. You can also build slatted screens to hide unsightly HVAC units or trash cans. Shorter pieces easily assemble into custom outdoor side tables.
Evaluating this strategy demonstrates the total lifecycle value of your purchase. You maximize every dollar spent. Assess your leftover pile carefully. Group pieces by length. Determine which secondary DIY projects you can complete with minimal additional hardware. A few exterior screws and some leftover construction adhesive are usually all you need.
Choosing the right boards determines your project outcome. You must categorize your options clearly. The market primarily offers two solution categories.
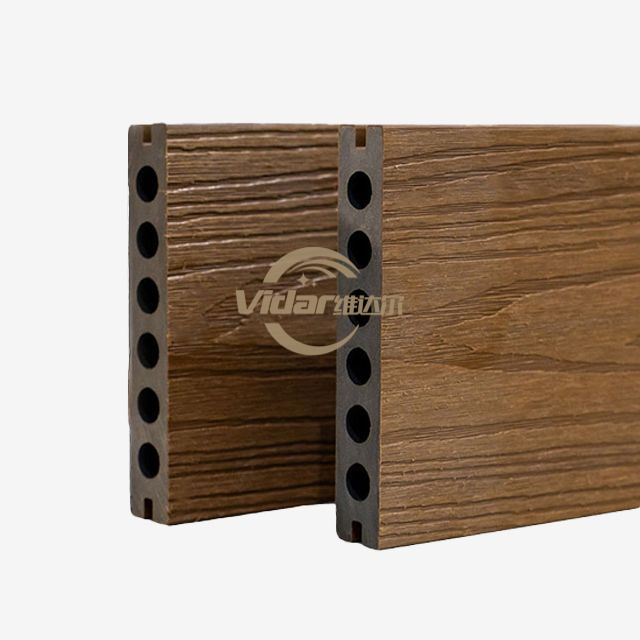
First, consider scalloped boards. Manufacturers groove out the bottom to save material. They are lighter and highly cost-effective. They are ideal for standard linear runs where edges remain hidden.
Second, look at solid boards. They are heavier and structurally dense. They mimic real wood grain on the cut ends. They are absolutely mandatory for stairs, exposed edges, and picture-framing designs.
You must evaluate these categories across key dimensions before buying.
Capping Technology: Assess the protective polymer shell. Are the boards capped on 3 sides or 4 sides? A 4-sided cap offers superior moisture resistance. It prevents water absorption from below. It also improves overall scratch durability.
Fastener Compatibility: Evaluate your own DIY skill level. Proprietary hidden clip systems create a flawless surface. However, they require routing and precise alignment. Color-matched face screws install much faster. They are friendlier for beginners but leave visible hardware.
Use this shortlisting logic for your next steps. Request physical samples from the manufacturer. Test their scratch resistance with a key. Observe their color fastness in your local yard lighting. Finally, cross-reference the DIY installation manuals. You must ensure all warranty requirements align with your chosen project idea.
Executing a DIY upgrade requires more than just enthusiasm. The critical relationship between your project scope, structural realities, and material choice dictates your success. You cannot cut corners on foundational framing or ground clearance. Proper planning protects your investment from moisture damage and sagging.
We see that successful installation relies entirely on rigorous planning. You must calculate expansion gaps accurately. You must strictly enforce tighter joist spacing. You must also implement aggressive moisture management, especially around planters and ground-level builds.
Take action today to move your project forward. Direct your focus from inspiration to procurement. Order a sample box to test colors in your backyard. Utilize a comprehensive material calculator to determine your exact board count and necessary overage. This structured approach guarantees a beautiful, enduring outdoor space.
A: No. Standard woodworking tools work perfectly fine. However, highly abrasive engineered materials dull standard steel blades very quickly. A carbide-tipped, fine-tooth saw blade is strongly recommended. It ensures clean cuts and prevents the plastic capping from melting or chipping during the cut.
A: Generally, no. Most manufacturers strictly require specific clearance beneath the framing. This ranges from 1.5 to 6 inches. This gap allows for necessary cross-ventilation. Proper airflow prevents trapped moisture, stops severe board warping, and keeps your manufacturer warranty fully intact.
A: Follow the manufacturer-specific gapping tables carefully. These charts dictate the required gap based on the exact ambient temperature during your installation day. Utilize approved hidden fasteners. These specific clips secure the board to the joist while allowing it to slide slightly as temperatures fluctuate.