Views: 0 Author: Site Editor Publish Time: 2026-08-13 Origin: Site


Discovering a cracked, heavily stained, or warped decking board can quickly dampen your enjoyment of an otherwise beautiful outdoor space. We often fear the worst when we spot a flaw. However, spotting a damaged section does not necessarily mean the entire outdoor area requires a costly teardown.
Individual WPC Decking boards can be surgically replaced. You just need to ensure the underlying substructure remains structurally sound. Minor accidents happen. Heavy objects drop, and localized wear occurs. Fixing these isolated issues is highly manageable.
This guide outlines the specific diagnostic criteria for partial replacement. We will show you the step-by-step extraction process to safely remove broken planks. Finally, you will learn how to manage the aesthetic challenges of integrating brand-new boards seamlessly with an aged deck.
Before you grab your pry bar, you must accurately assess the damage. Fixing a deck requires determining whether the problem is isolated to the surface or if it hints at a deeper, systemic failure. Misdiagnosing this can lead to wasted effort.
Surface-level damage typically impacts just one or two boards. This kind of wear happens from daily life. Heavy dropped objects can cause impact fractures. A misplaced fire pit might leave localized scorch marks. You might also find deep scratches from dragging patio furniture or stubborn grease stains from a barbecue grill. In these cases, you only need to replace the affected boards.
Systemic damage tells a different story. If you observe widespread warping across the deck, you face a larger issue. Sagging across multiple boards often points to joist failure underneath. Severe mold infiltration covering large zones usually indicates poor ventilation or chronic moisture problems. When you see these signs, you must consider a full rebuild or major remediation.
Damage Assessment Overview
| Damage Type | Visual Indicators | Recommended Action |
|---|---|---|
| Surface-Level | Deep scratches, scorch marks, isolated cracks. | Extract and replace individual boards. |
| Moisture Intrusion | Swelling on a single uncapped board. | Replace the board, check local drainage. |
| Systemic Failure | Widespread sagging, spongy feel across deck. | Inspect substructure; likely requires rebuild. |
| Severe Mold | Extensive fungal growth across multiple panels. | Address ventilation; partial or full rebuild. |
You must weigh the financial threshold of your repair project. Compare the cost and labor of extracting two or three boards against stripping the entire deck surface. Sourcing a few replacement boards remains highly cost-effective. You save thousands of dollars in materials.
However, labor scales poorly if the damage spreads. A common industry guideline suggests the 15-20% rule. If more than 15-20% of the deck requires patching, replacing the entire surface becomes more economical. Hunting down matching boards and laboring over dozens of spot repairs will exhaust your time and budget.
A beautiful deck surface relies entirely on a strong foundation. You must verify the health of your joists before installing any new material.
Fastening new panels to rotting wood joists guarantees premature failure. It also creates significant safety hazards. The new boards will eventually sag or break under load. A solid substructure ensures your repair lasts for decades. Ignoring the frame is a common mistake that leads to double the work later.
Follow these diagnostic steps to evaluate your frame. Professional builders use these exact methods to audit older decks.
Once you finish your inspection, you reach a critical decision gate. If the joists show only localized rot, you have a straightforward fix. You can save the substructure by "sistering" a new treated timber joist alongside the damaged one. Bolting a new joist to the old one restores structural rigidity.
Conversely, if rot is systemic and affects multiple joists, you must stop. A full rebuild of the frame is mandatory. Do not attach premium composite materials to a dying frame.
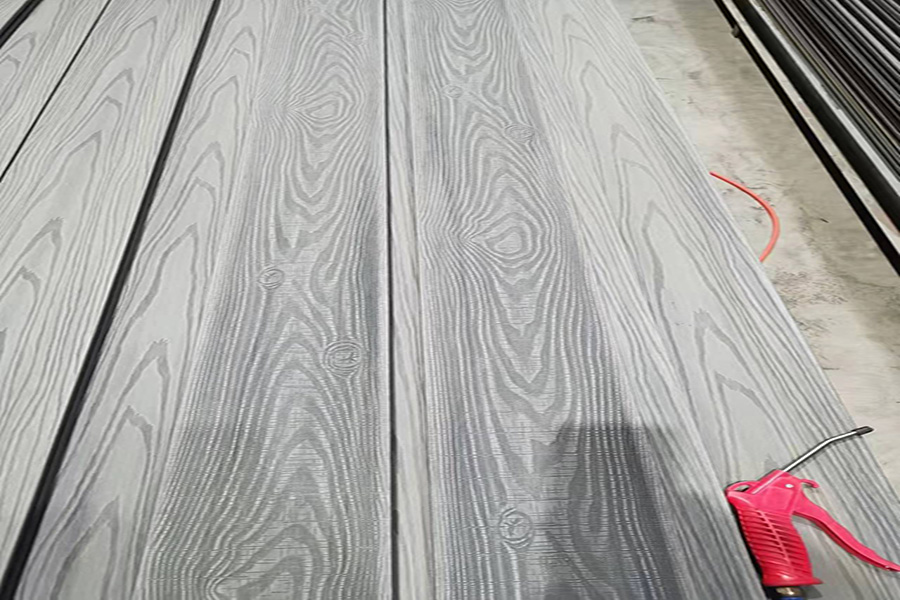
Extracting a single board requires patience. Rushing the process can easily damage adjacent panels or break underlying hidden fasteners. Follow this systematic approach to ensure a clean swap.
First, you must identify how the deck is held together. Distinguish between three common attachment methods:
Your extraction method depends entirely on your fastening system. Take your time here to prevent collateral damage.
For Hidden Clips: Loosen the screws on the clips securing the damaged board. You must also loosen the clips on the adjacent board to relieve tension. Once loose, slide the damaged board horizontally out of the clip tracks. If it feels stuck, gently tap the end with a rubber mallet.
For Face Screws/Plugs: If you have plugs, core them out carefully with a drill. Next, reverse the screw using a standard impact driver. Sometimes, old screws are stripped or rusted tight. If screws are stripped, carefully cut the board down the middle with a circular saw. Set your saw blade depth to exactly match the board thickness. Pry it out in two pieces. This avoids damaging the joist or surrounding clips.
Do not immediately install the new board. Clear all dirt, leaves, and debris from the exposed joist. Inspect it one more time for any hidden soft spots. Apply a fresh layer of joist tape over the exposed timber. This flashing tape protects the wood from future water exposure and extends the life of the frame.
Slide the replacement board into the loosened hidden fasteners. You must pay close attention to spacing. Ensure proper expansion gaps are maintained at the butt joints. Typically, you need 3-5mm gaps to accommodate thermal expansion. Composite materials expand and contract with temperature changes. Without this gap, boards will buckle under the summer sun.
Finally, re-tighten all clips firmly. Secure the board and walk on it to ensure there are no squeaks or loose spots.
Replacing a board is mechanically simple. Making it look invisible is the true challenge. You must manage aesthetic realities when mixing new and old materials.
Standard composite materials change slightly over time. They fade during their first 3 to 6 months of UV exposure. This initial weathering process stabilizes the color. Because of this, a brand-new board will stand out sharply against an aged deck. It usually looks darker, richer, and glossier than its neighbors.
Professional deck builders use a clever trick to bypass the weathering problem. They use a "donor board" strategy.
This strategy guarantees perfect color harmony in your main entertainment spaces.
You might wonder why you cannot just buy the exact same product code. Even if purchasing the exact same brand and color line, slight manufacturing variations occur. Different production runs yield minor pigment shifts. The donor board strategy completely neutralizes these batch consistency issues.
When a board fails, you should ask why it failed. Understanding the root cause helps you prevent future headaches. You might want to upgrade the replacement material.
If the original board failed due to excessive moisture absorption, severe staining, or deep mildew, it was likely an early-generation uncapped composite. First-generation composites mixed wood fibers and plastics but left the wood particles exposed on the surface. These boards are prone to soaking up water and grease.
Modern manufacturing solves these older issues. Utilizing Outdoor Co-Extrusion WPC Decking offers massive performance benefits. Also known as capped composite, this material features a 360-degree polymer shield. The core is completely encased in a tough, impermeable plastic layer.
This provides superior resistance to UV fading, moisture ingress, and scratch damage compared to traditional materials. If you frequently drop heavy items near your grill, replacing the damaged zone with co-extruded boards adds a heavy-duty layer of protection exactly where you need it most.
Before you mix and match technologies, heed this compatibility warning. Ensure the new co-extruded boards share the exact same thickness and grooved profile as the existing deck. If they are even slightly thicker or thinner, they will create a tripping hazard. Furthermore, mismatched side grooves will prevent your hidden fasteners from aligning perfectly. Always measure with calipers before purchasing upgrade materials.
Replacing individual decking panels remains a highly practical maintenance strategy. It saves money, reduces waste, and dramatically extends the lifespan of the overall deck. You do not need to tear down a perfect frame just because a few surface planks suffered localized damage.
For the best results, prioritize joist health inspections before purchasing materials. Never bolt premium panels to rotting wood. Finally, use the donor-board swapping method. Moving a hidden, weathered board to the damaged spot ensures perfect aesthetic harmony, making your repair entirely invisible to guests.
A: Yes. By loosening the fasteners on the immediately adjacent boards, you can slide the damaged board out and slip the new one into the existing track. It requires patience but prevents damage to the surrounding area.
A: It depends on the board's profile. Reversible boards with identical textures on both sides can sometimes be flipped. However, boards with grooved bottoms for weight reduction or single-sided capping cannot be inverted.
A: It is strongly discouraged. Different manufacturers use unique board thicknesses, densities, and side-groove dimensions. Mixing brands compromises the hidden clip system and creates uneven surfaces.
A: Depending on sun exposure and whether it is traditional or capped composite, it typically takes 12 to 16 weeks for a new board to complete its initial color stabilization.